| |||||
 |


LCD Overhead Projector - Laptop Powered - Previously On Instructables
*-* Click images for Huge PicturesForeword
This is another instructable to build a LCD video projector. I'm saving a laptop from the landfill and using an antiquated 3M 955 overhead projector that was damaged
beyond classroom use.
So UW-Madison hosts a competition called the 100 hour challenge annually, for the competition they give you a voucher for $10 for our surplus store on campus (sells state property that is no longer needed by the state). You are to take the $10, buy junk, and turn it into:
Most value (money) generated
Most social value
Most creative
People's choice award, project most viewed online
I was beaten out by a coffee table :( I think it may have something to do with winning a few thousand in a different competition earlier this week. . .
I'm going for the most value generated since video projectors are still way expensive.
So let's get started!
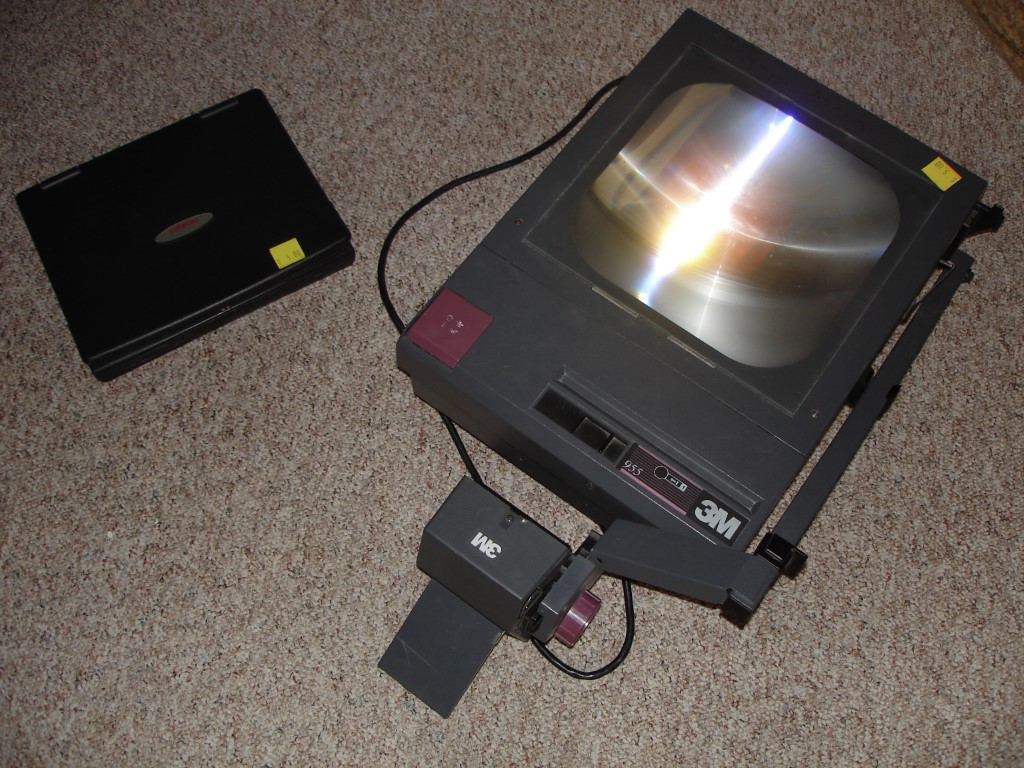
Image Notes
1. You'll need an old laptop and an overhead projector
1. You'll need an old laptop and an overhead projector
Step One: Make Projector Repairs
In this case, I've gotten a $5 projector with a cord missing the plug, so we're expecting trouble!
I first cut the cord down and put a decent end on it. Further inspection within the projector revealed that it had no bulbs and had a damaged fan due to poor design (you can slide the bulb caddy right into the fan)
If you need help putting a new plug end on, check out my other project on that - How to Make a Short Cheap Extension Cord
Lastly, once you think you've caught all the problems, plug it in and fire it up! In this case we've gotten all the essentials covered and the projector works perfectly.
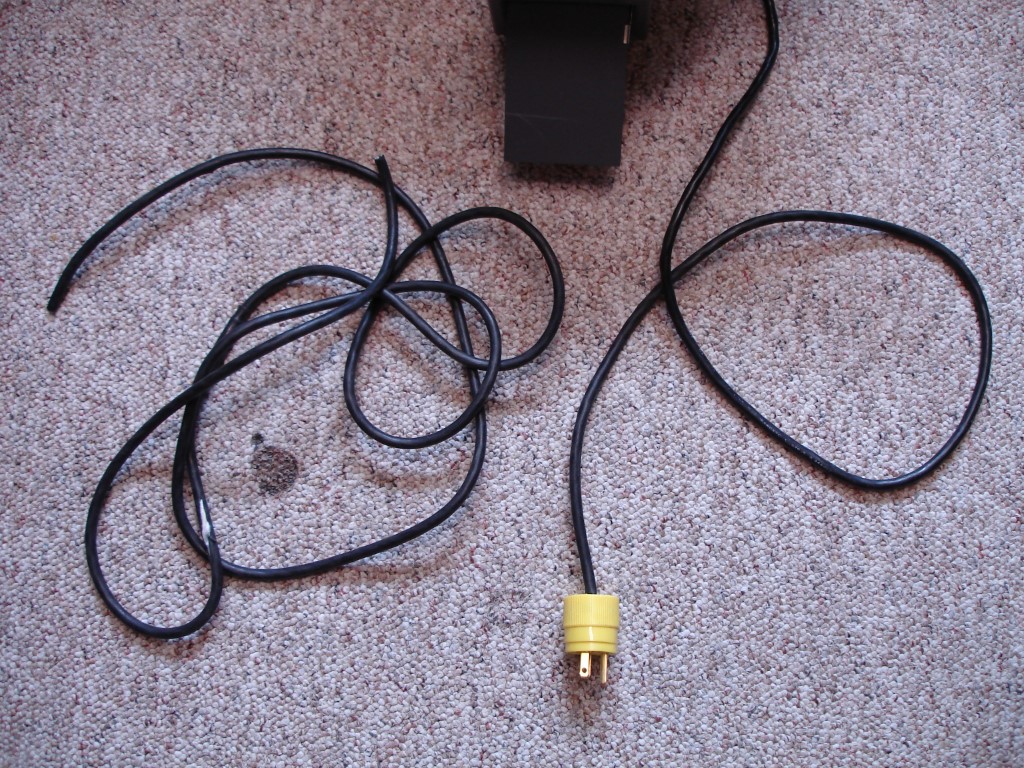
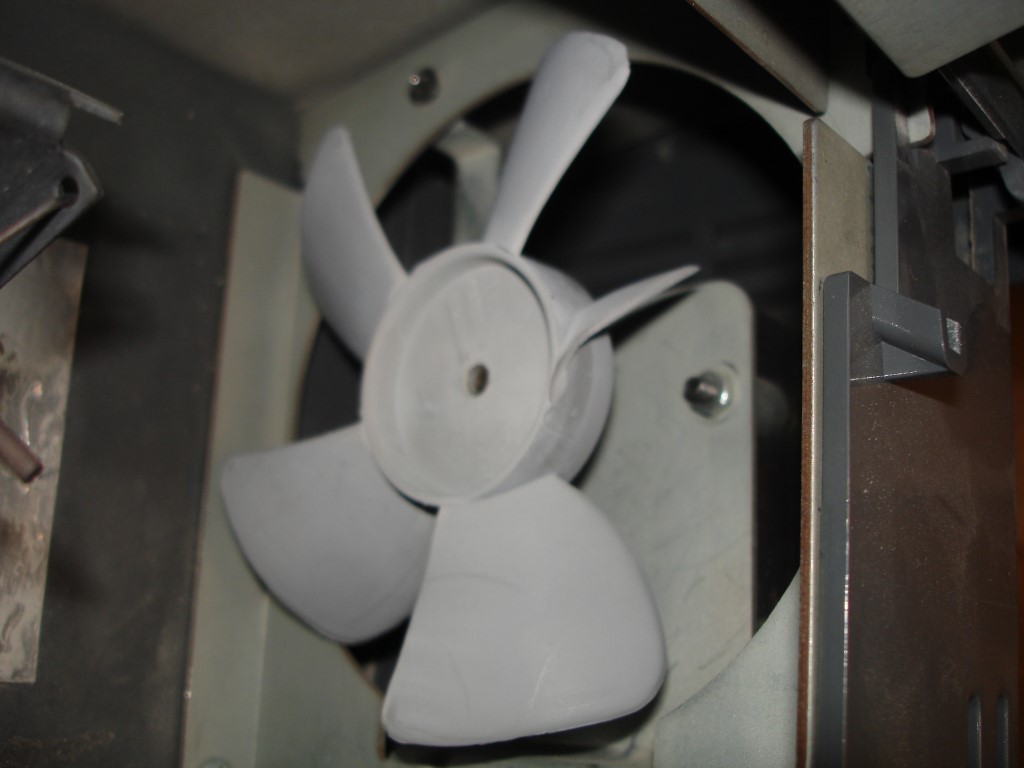

Image Notes
1. Old cord to the left and new terminated cord on the right, the old one had big chunks of insulation missing.
2. Fan missing a blade, in this case we didn't care but you should attempt to find a replacement, these fans are 120V so spec accordingly.
3. Happy projector up and running, if yours doesn't check the light bulb (or switch the slider to the other).
Step Two: Laptop Checkout
The next step is to get the laptop going. In this case I'm stuck with a more than archaic Pentium II 233mhz, 32mb of ram with a 13" screen (1024x768 though!), hopefully
you're starting with something a bit more useful as this one won't even boot Ubuntu live. On the plus side, it does boot up with no major problems aside from a missing
hard drive and a very unique hard drive connection.
So lets get hacking!
So lets get hacking!
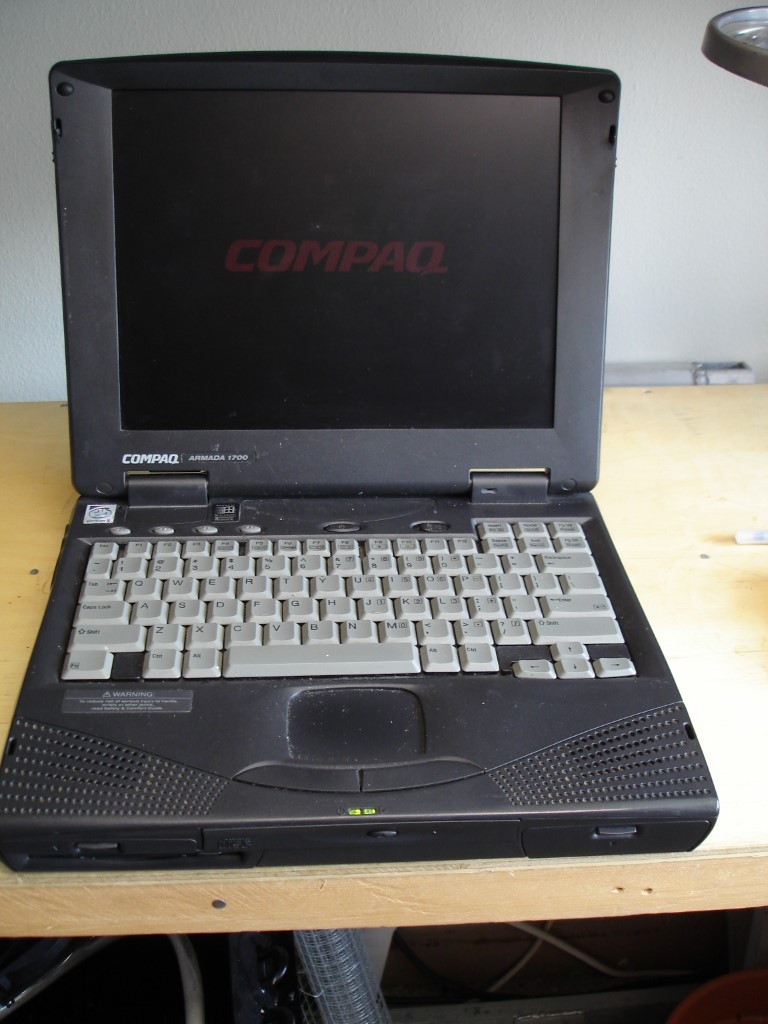
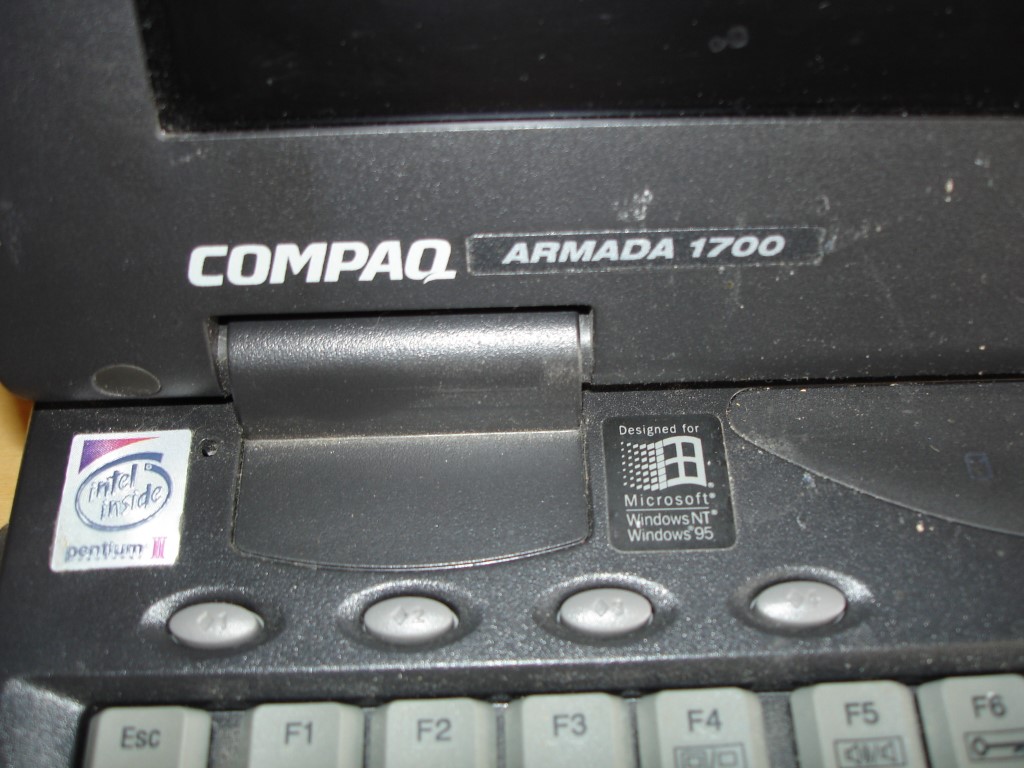
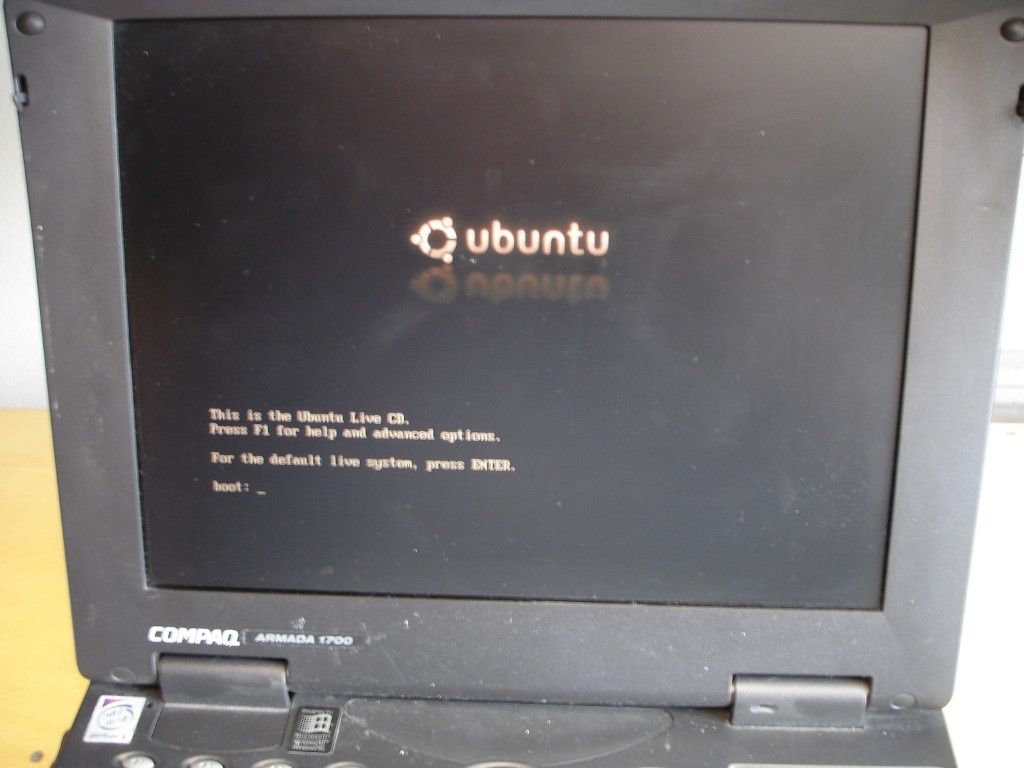
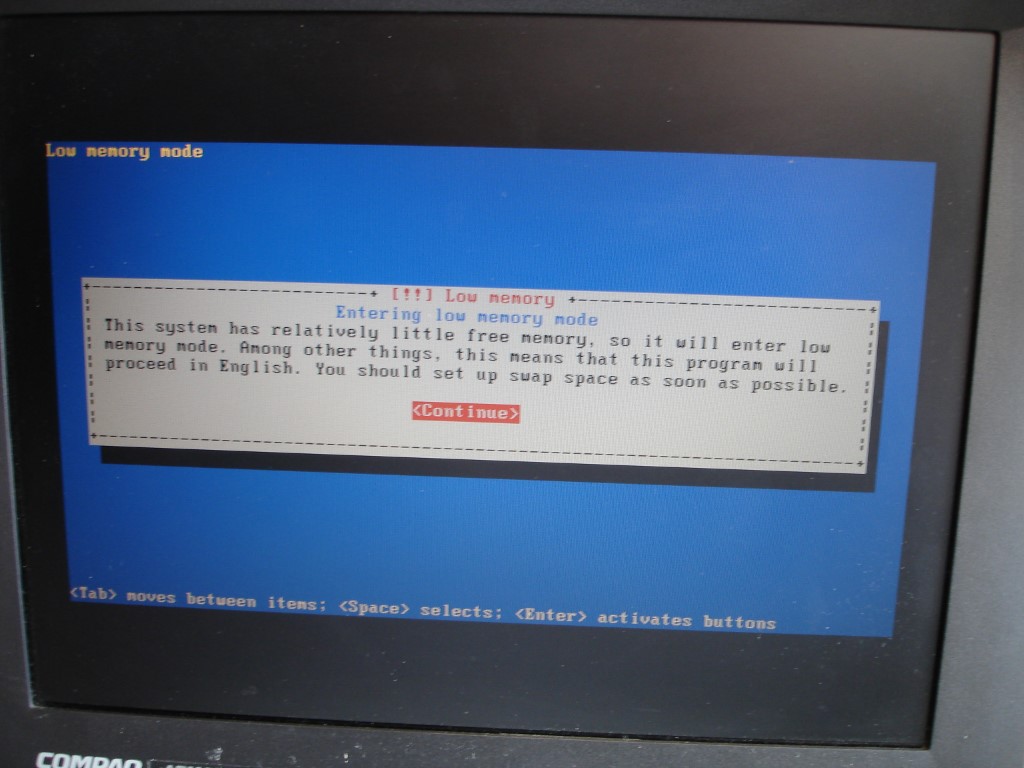
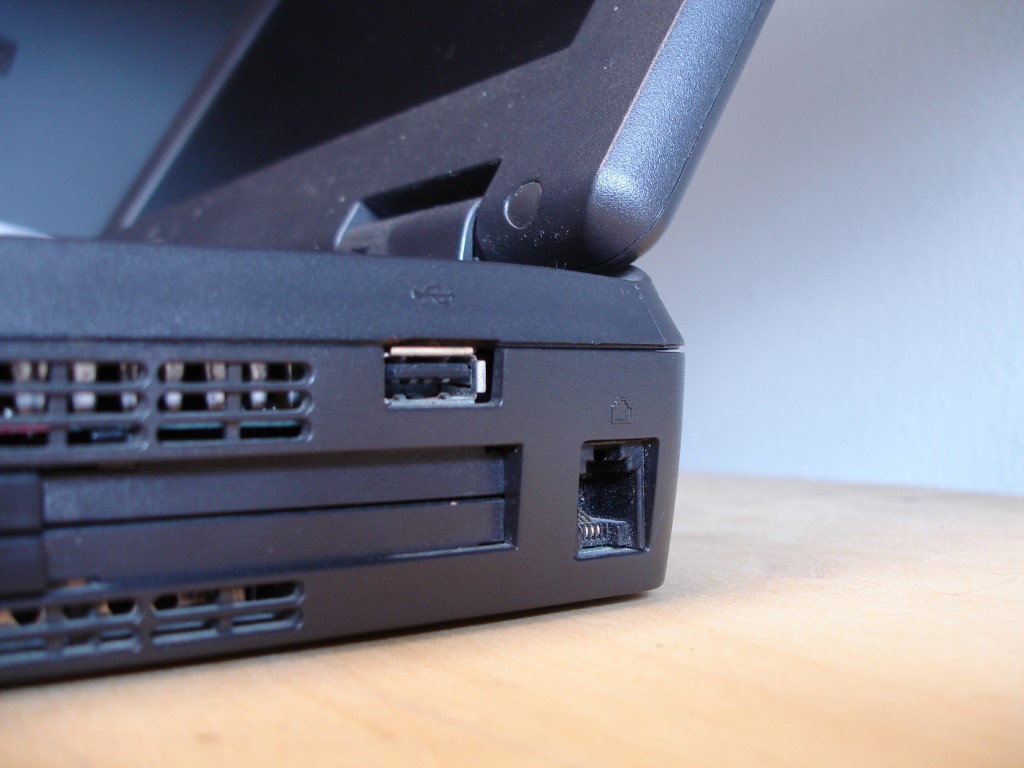
Image Notes
1. Boots! Unfortunately so slow. . .
2. Bet it barely met '95 specs!
3. CD-ROM works!
4. Ouch! Won't even boot linux live and I can't find a hard drive, oh well, moving ahead.
5. USB next to an internal modem, yes, it's old.
1. Boots! Unfortunately so slow. . .
2. Bet it barely met '95 specs!
3. CD-ROM works!
4. Ouch! Won't even boot linux live and I can't find a hard drive, oh well, moving ahead.
5. USB next to an internal modem, yes, it's old.
Step Three: Laptop Surgery
The next step is to take apart the laptop to get down to the bare LCD monitor.
- First, unplug the computer and remove the batteries from it.
- Second, remove the front screws from around the bezel of the LCD - there are usually 4 hidden under the rubber bumpers aound the panel - and also the hinge covers.
- Once you get those off the bezel should come loose! Then remove the inverter and unplug any cables you now have access to.
- Next remove the screws holding the panel in the surround and free the panel from the laptop.
- Once you get the panel out take out anything else required to get the screen backing and hinges off the laptop.
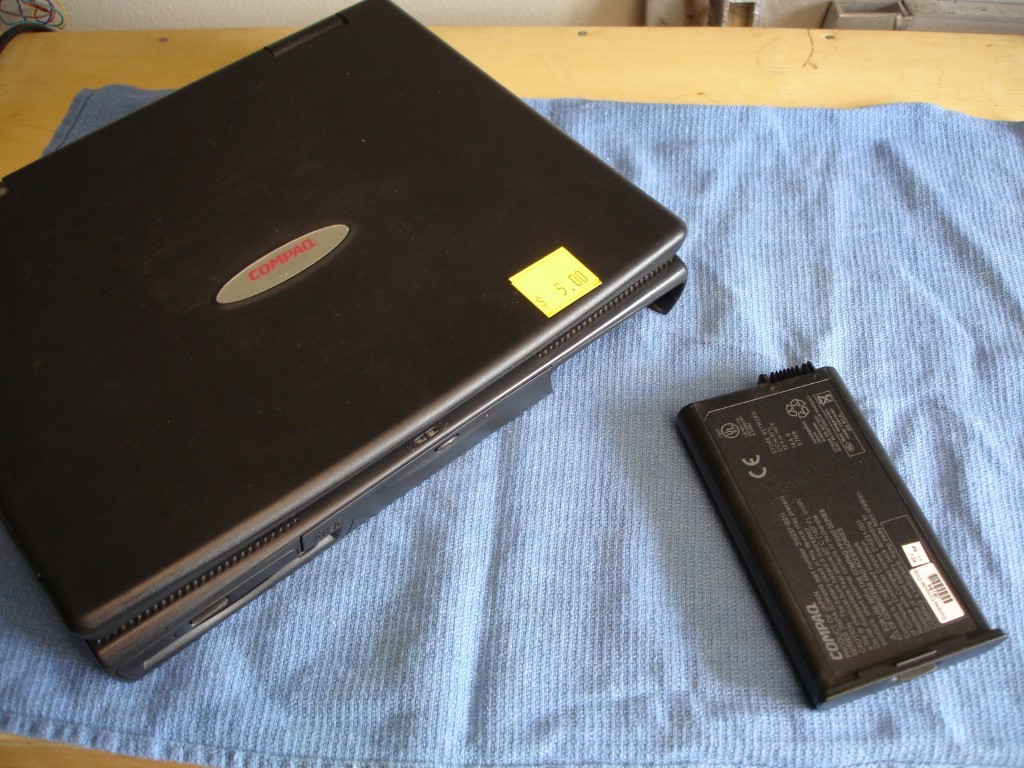
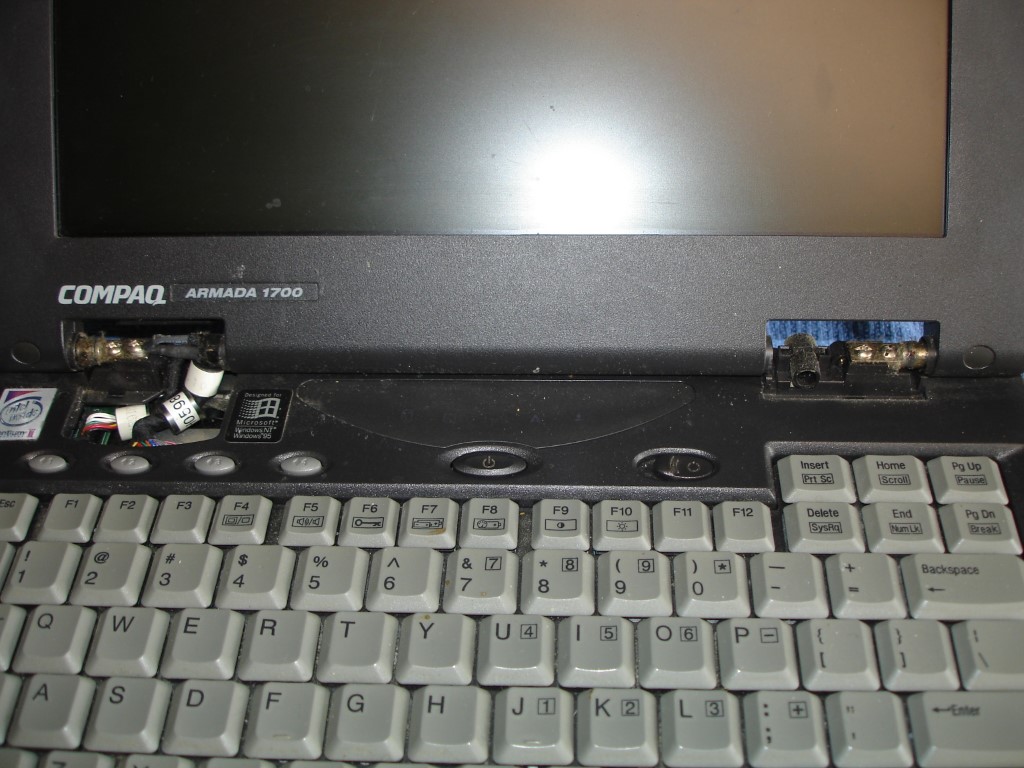
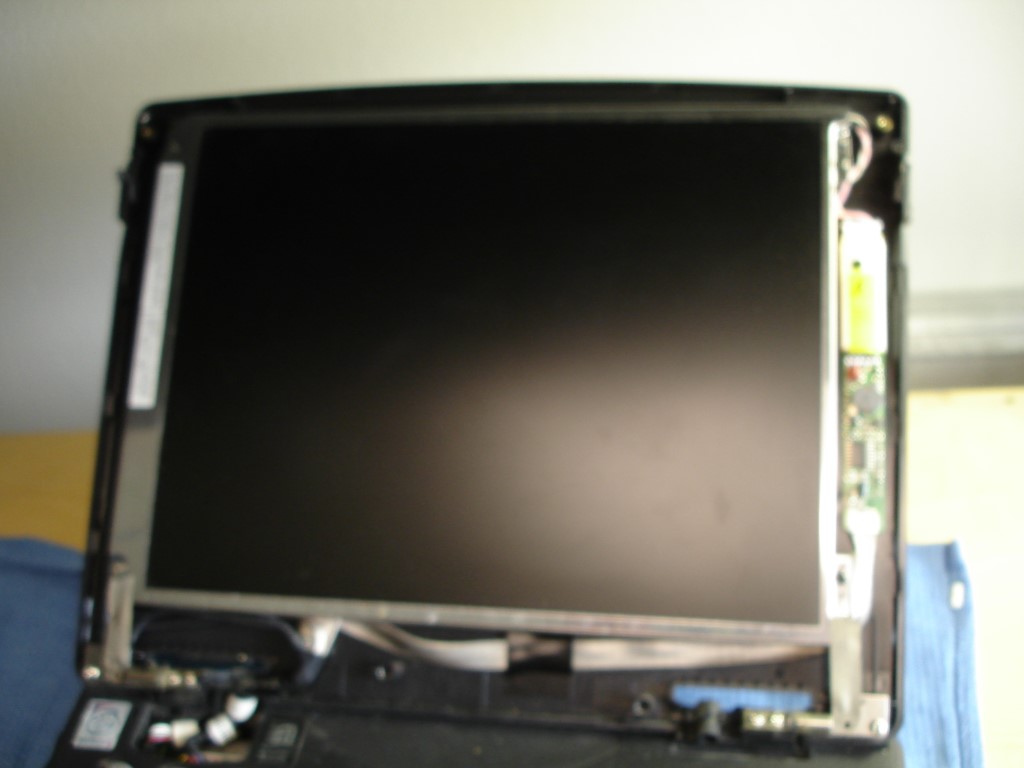
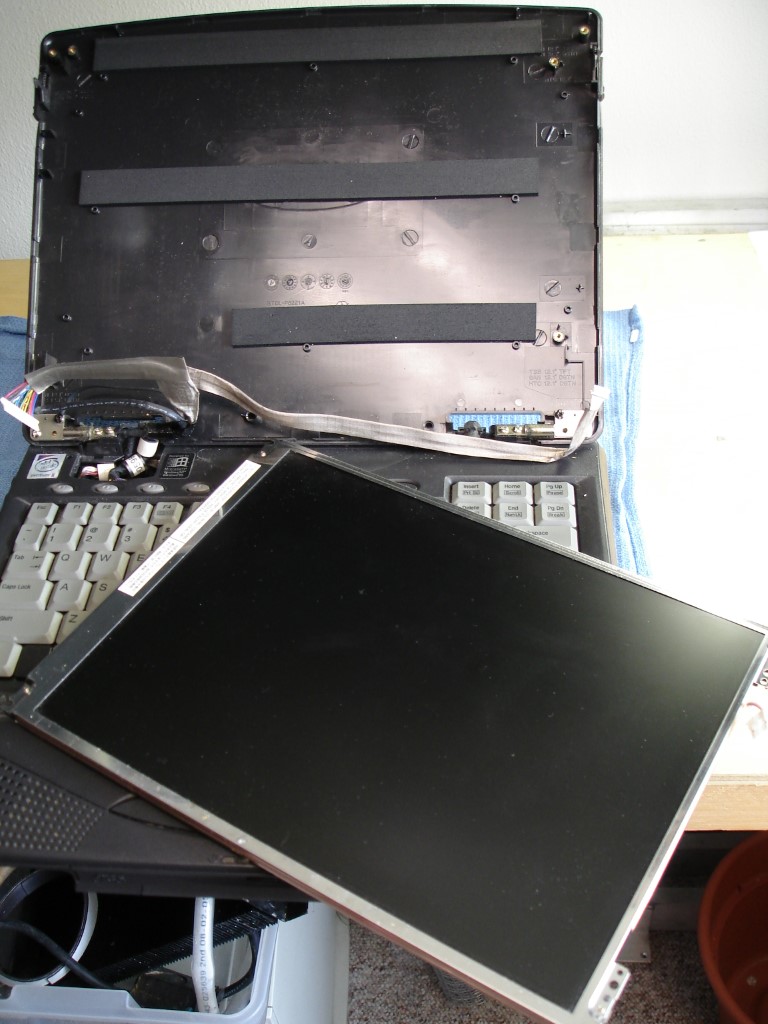
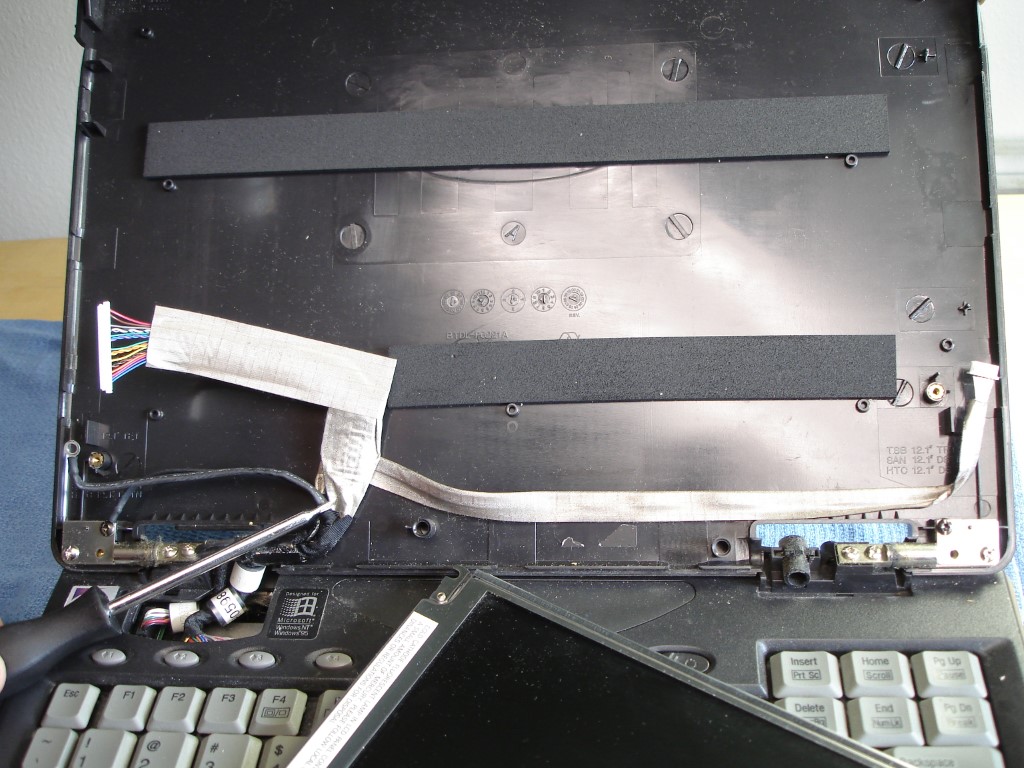

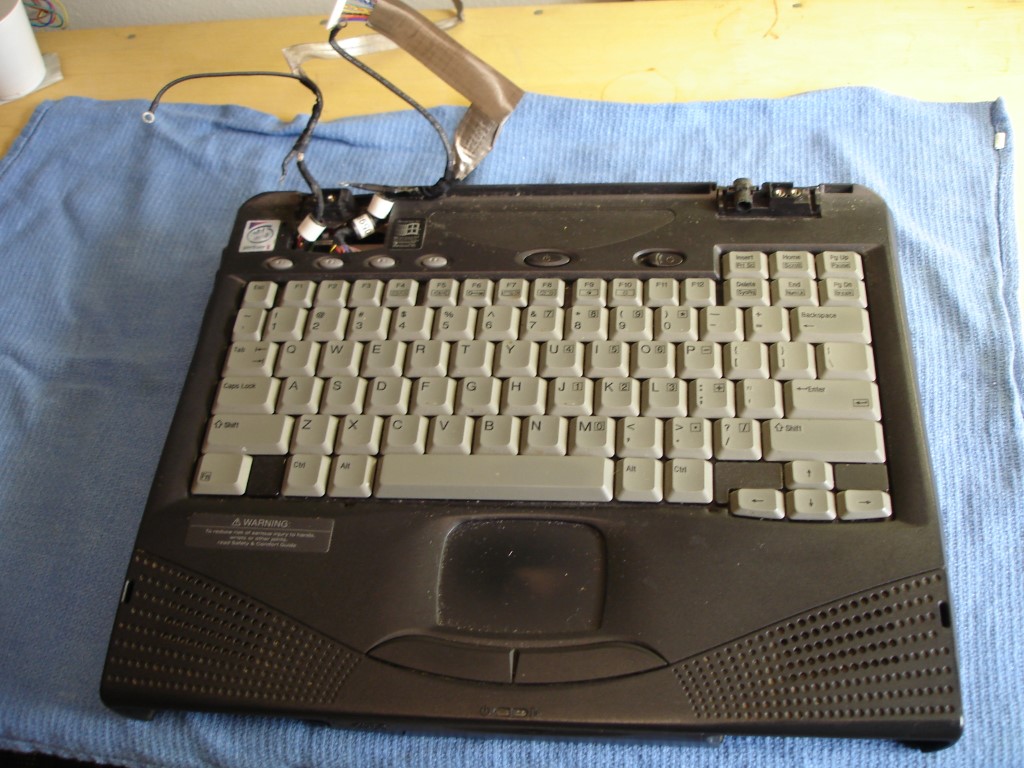
Image Notes
1. REMOVE Battery!
2. Pull screws from around the outside of the monitor (behind the little rubber round covers), then the hinge covers just pull off.
3. Note the inverter on the right side inside the bezel, this is typically the only electronic component in the bezel as it has to be near the backlights in the monitor.
4. Next remove the screws around the perimeter of the monitor and carefully disconnect the cables running to the back of the panel, WATCH OUT for connectors that are glued in.
5. Be careful in peeling the cables out of the back of the monitor.
7. You should now be the proud owner of a headless laptop.
Step Four: LCD Panel Disassembly
Now that the panel is free, we'll need to get taking it apart to get down to the LCD screen itself.
The first step is to remove the outside grounding tape from around the screen.
Next is to remove the all the tiny screws from around the monitor.
Now you'll want to start gently lifting around the edges of the metal shield to get it freed from the screen.
You should now be looking at the circuit board that runs the screen sections with a nice big flat flex cable (FFC) cutting through the middle of it - we'll have to take care of that next.
Disconnect the FFC cable and fold the circuit board carefully back. Now loosen up any crimps holding the metal bezel surround from the white plastic cradle that holds the screen. You should be able to carefully remove the white cradle along with the diffuser parts (acrylic sheet, polarizers, and other plastic layers).
Now you should be looking at the bare screen with two circuit boards, one on the top and one on the side. In the next step we'll be removing the FFC and soldering our own wires on those connections.

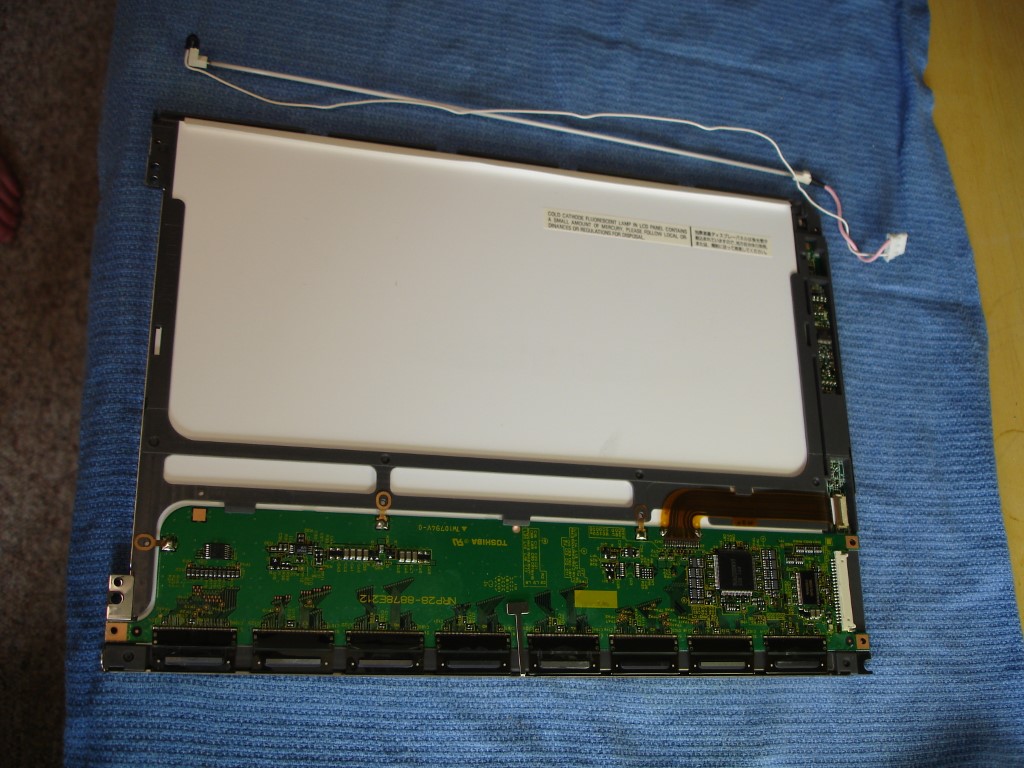
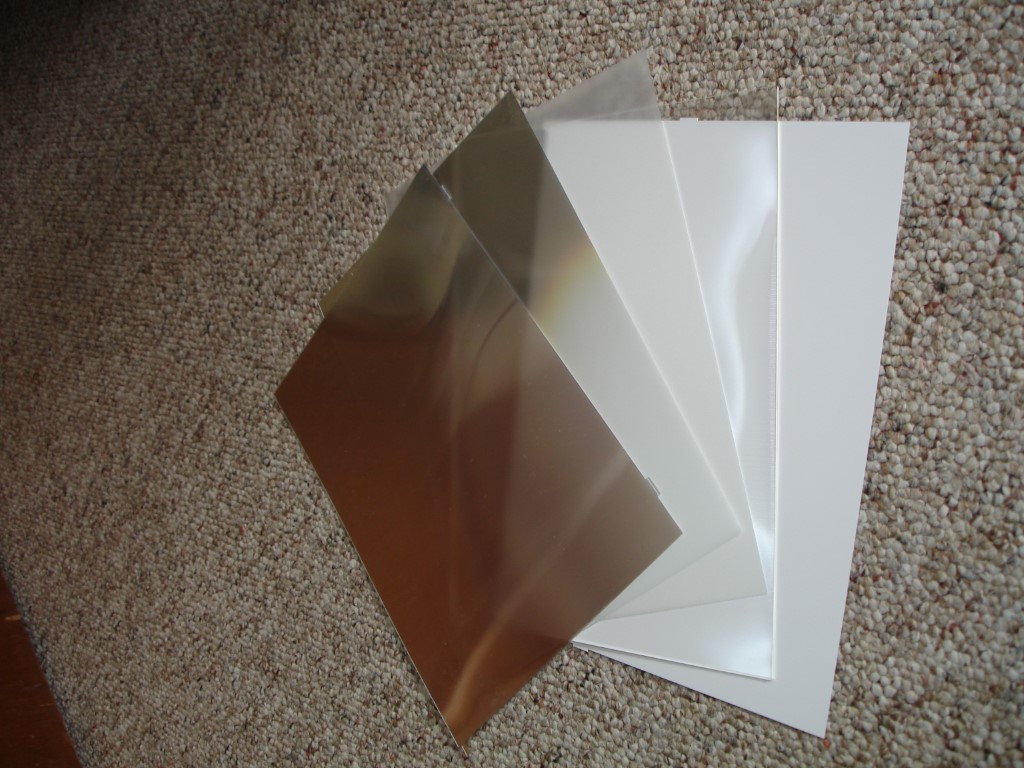
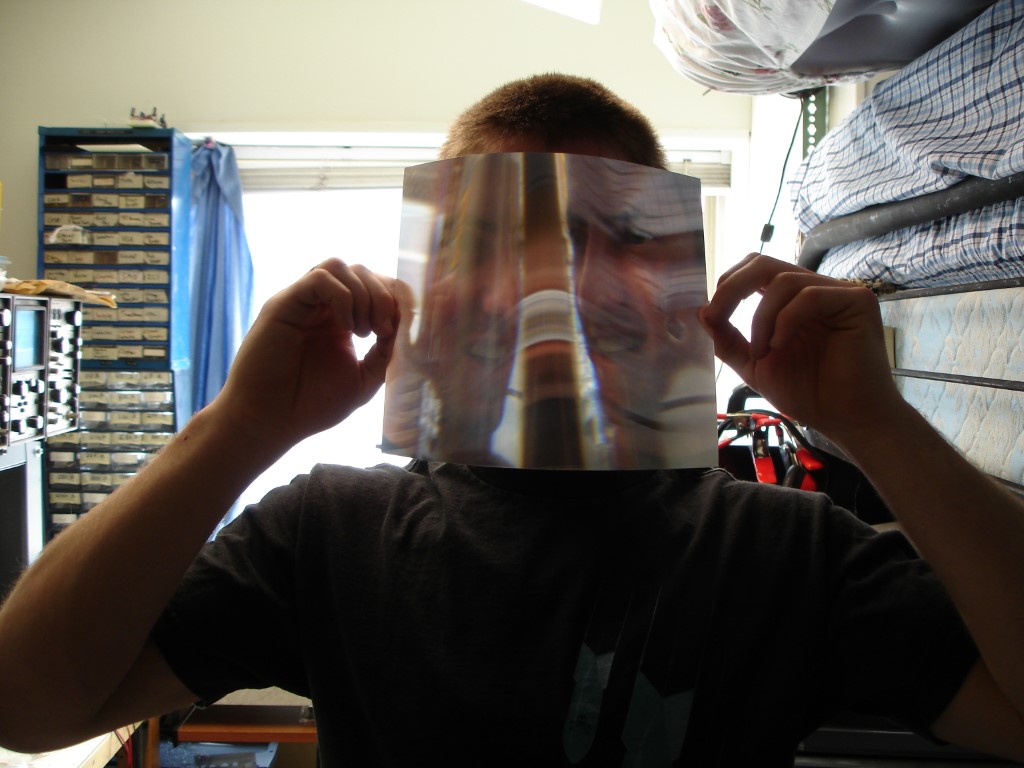
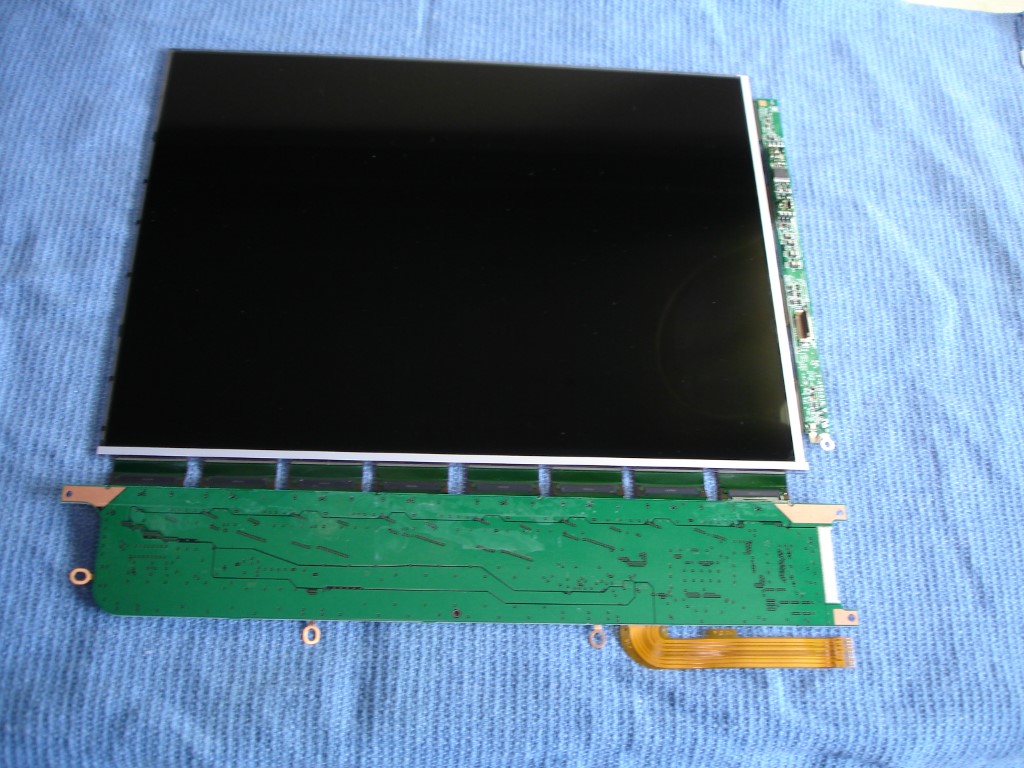
Image Notes
1. My laptop was old enough that it still had EMF copper shielding around the perimeter, you'll want to remove this.
2. You'll want to CAREFULLY disconnect the flat flex cable (FFC) that's in the way across the the back of the monitor and remove the polarizer/reflector array.
3. Darker sheets on top are the polarizers, followed by a slightly opaque sheet (evens light out), next is an acrylic microdot diffuser sheet (which catches light evenly across the monitor) and finally a whire reflective sheet to make sure we aren't leaking light out the back.
4. The polarized layers are fun to look through as they refract the light all over
5. Finally, you should end up with a bare LCD with two circuit boards on each side.
Step Five: Replace the FFC Cable
You can now see that we need to replace the original FFC to prevent it from interfering with the projected image. There are several ways to do this, you can check out my other LCD overhead projector project to see how you can create an extension cable or you can purchase some really thin wire and solder new connections on.
In this case I didn't have the luxury of a week or two to create an extension cable, so we'll be soldering in a replacement set of wires.
I ended up removing the original FFC and the original connector to clear good pads to solder the new wires to. As you can see in the pictures, the pads are 0.5mm spacing, so you'll need a steady hand, a reasonable size iron (not a 35W like me), and a lot of patience. I ended up soldering/desoldering/resoldering about 10 times before it was without shorts.
*****Keep in mind that you'll be transposing the wires since one board is now inverted, so pay attention to the wire runs to make sure you're hooking the right connection in the correct place*****
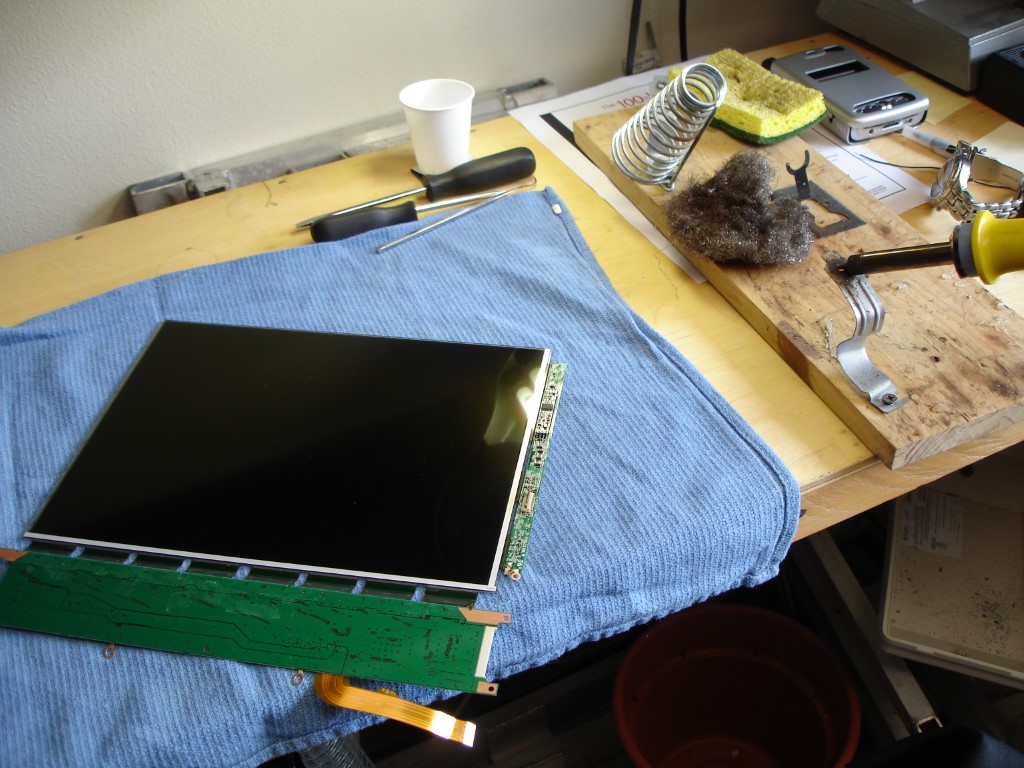
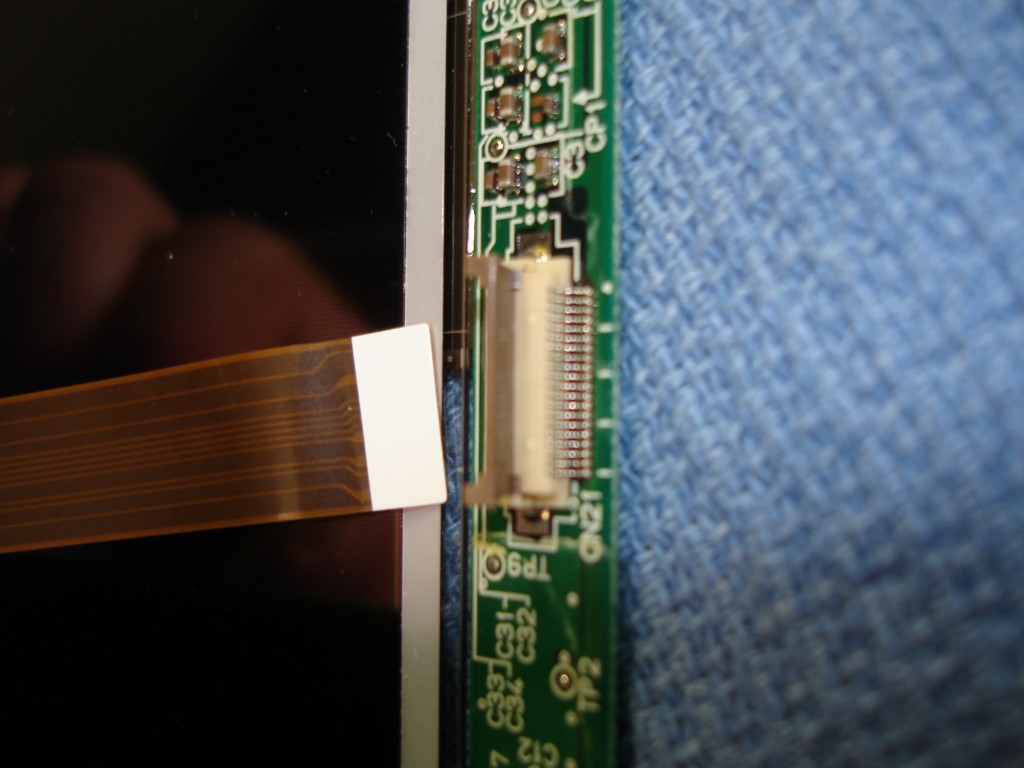
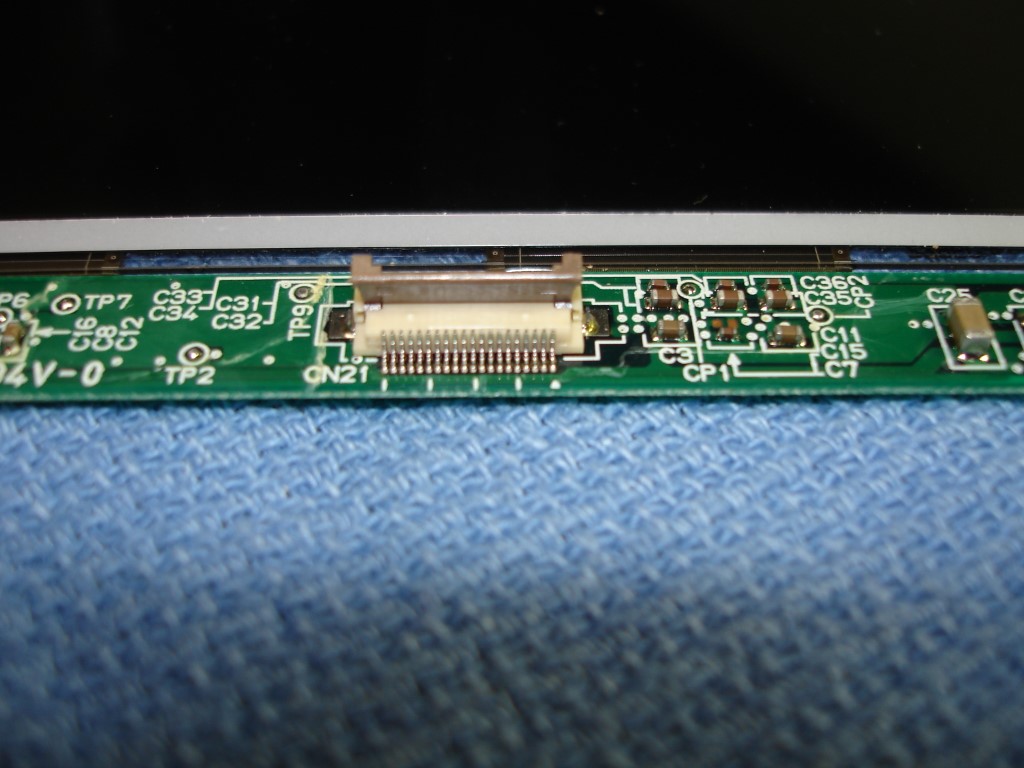
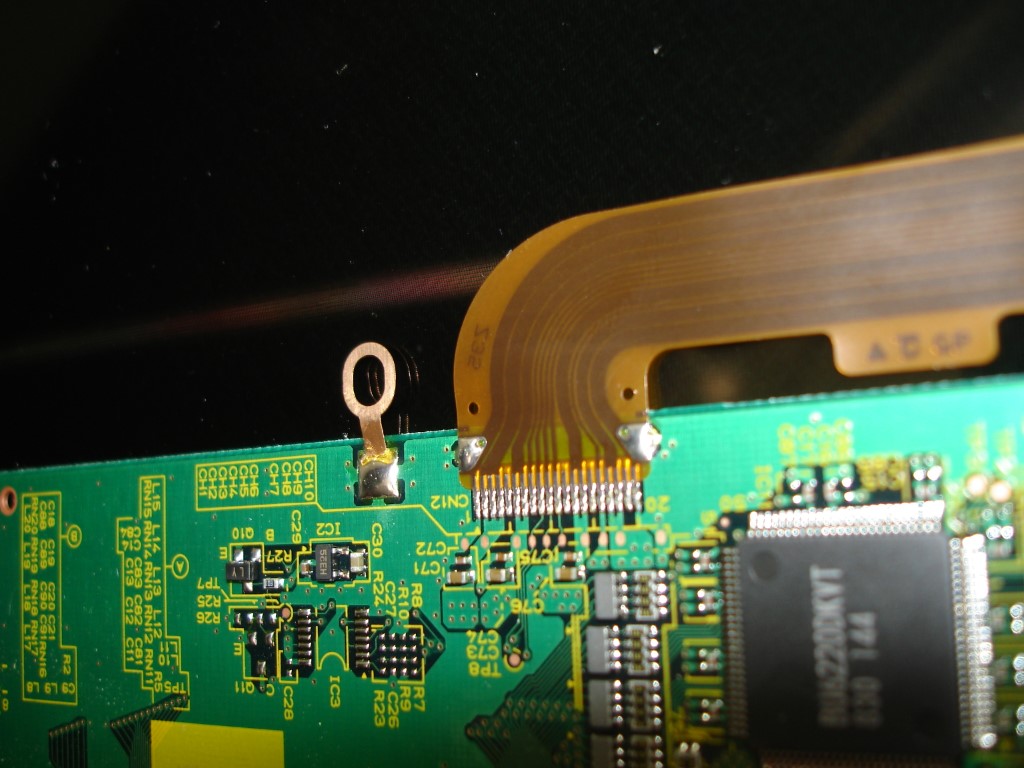
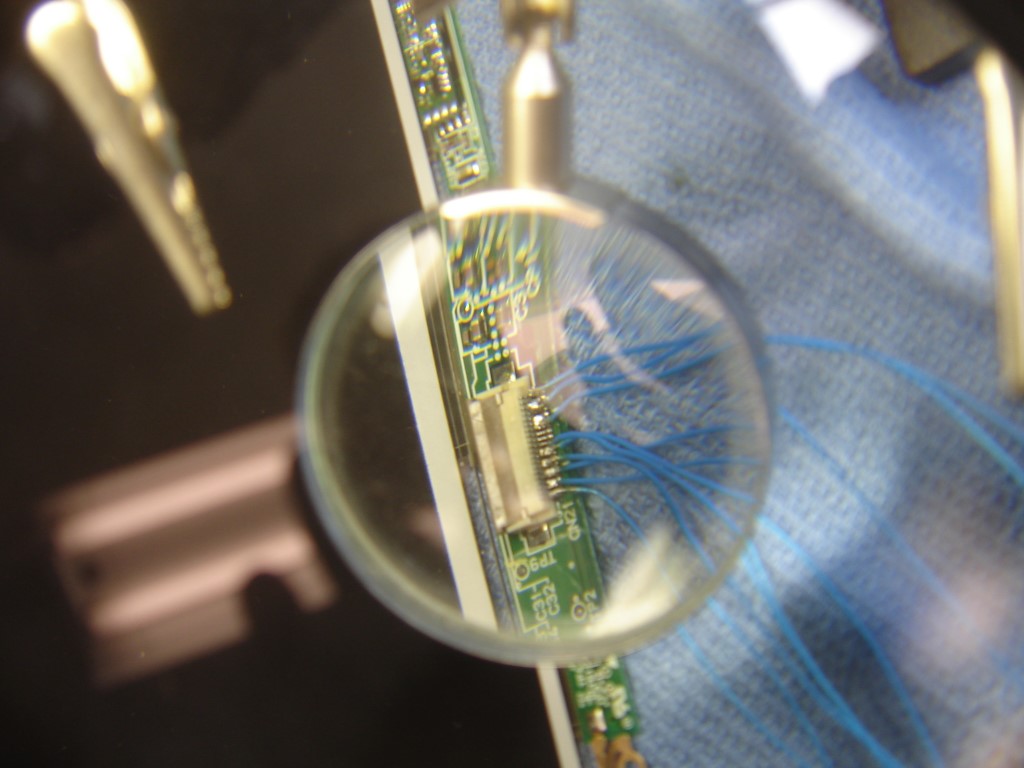
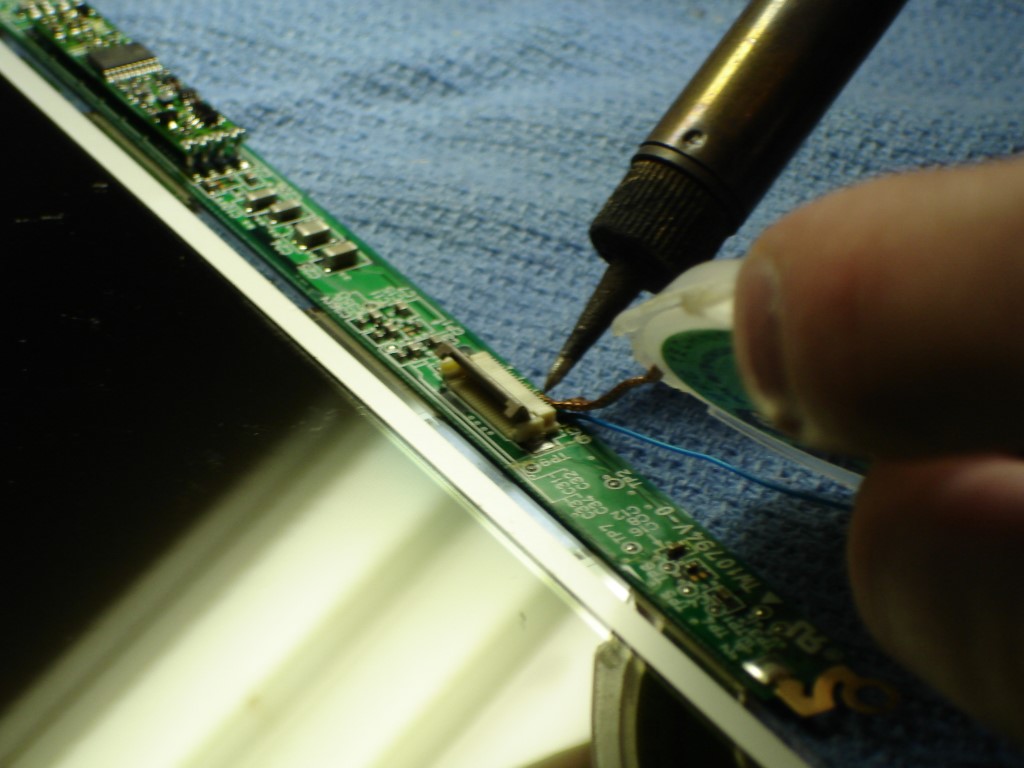
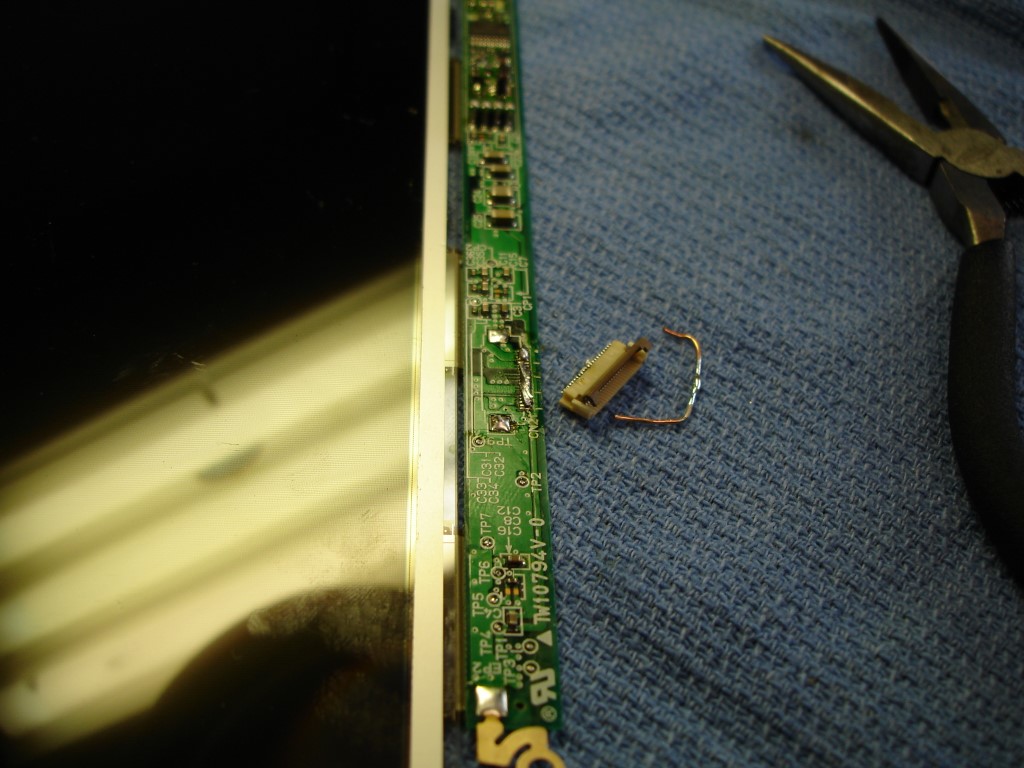
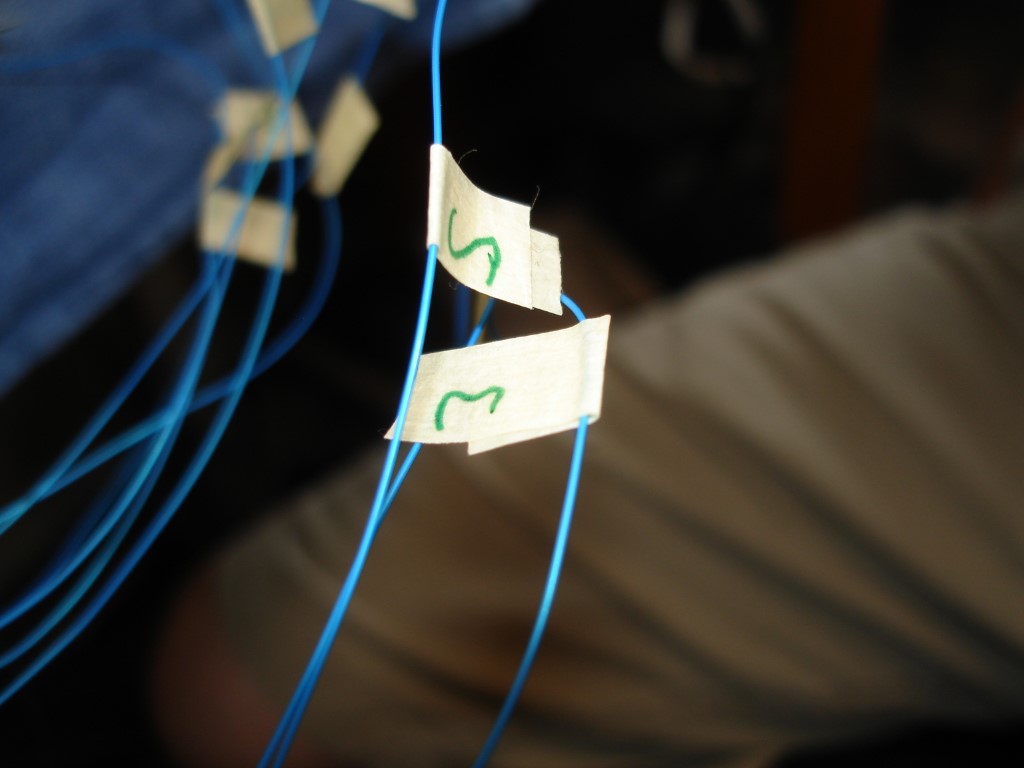
Image Notes
1. Keep the screen on something soft and you can see clearly I'm not using the best soldering station in the universe.
2. Flip up the FFC connector before attempting to remove the cable!
3. Note the tiny 0.5mm pin pitch here.
4. The other end of the FFC was actually larger pitch so it was significantly easier
5. Things started out alright, but I just couldn't get the last single pin connections done
6/7. So I decide to remove the connector and just go straight for the traces.
8. I've used duct tape to reinforce the connections to prevent the leads from falling off
9. Make sure you keep track of your wires, they're likely transposed so you'll have to reverse order when you attach them
Step Six: Check out Your Projector and Video Instructions
At this point all you have left is to mount the laptop near/on the projector (watch out, the projector will get hot!) and set the screen spaced about 1/2" off the surface of the projector to avoid browning the panel.
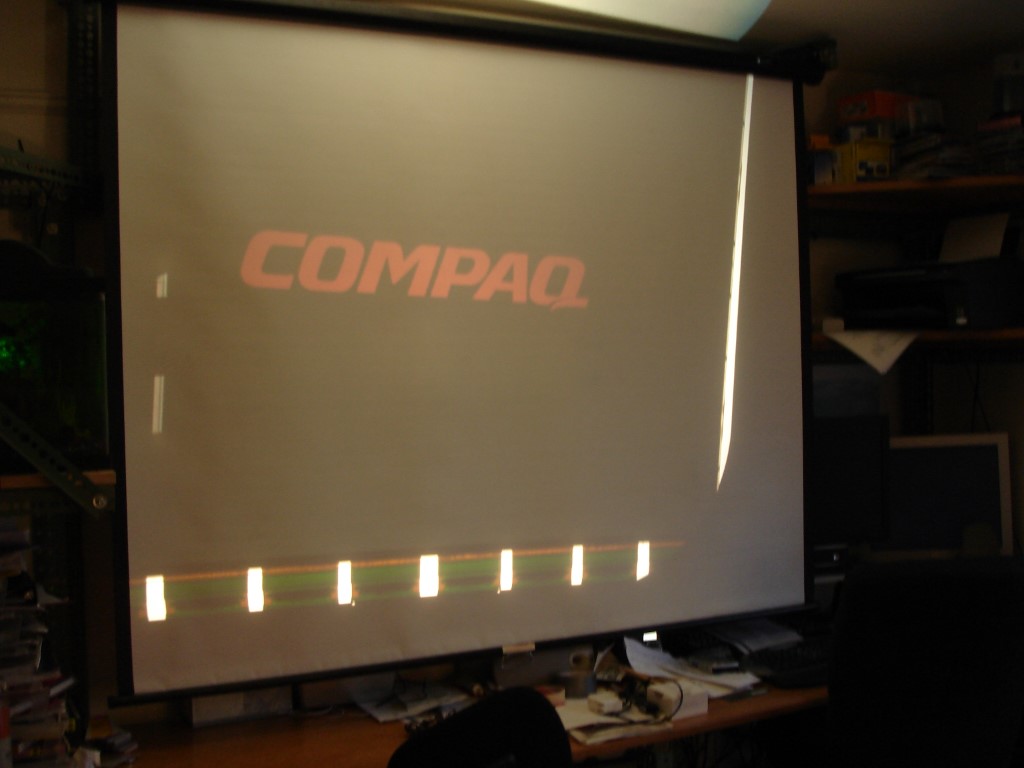
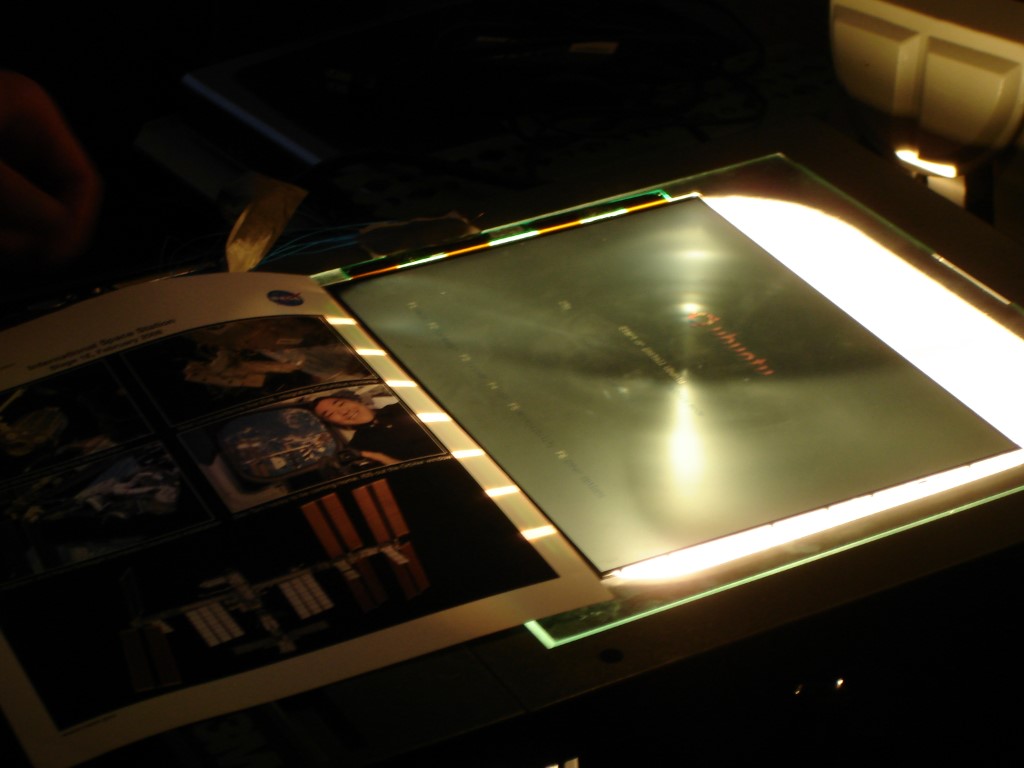
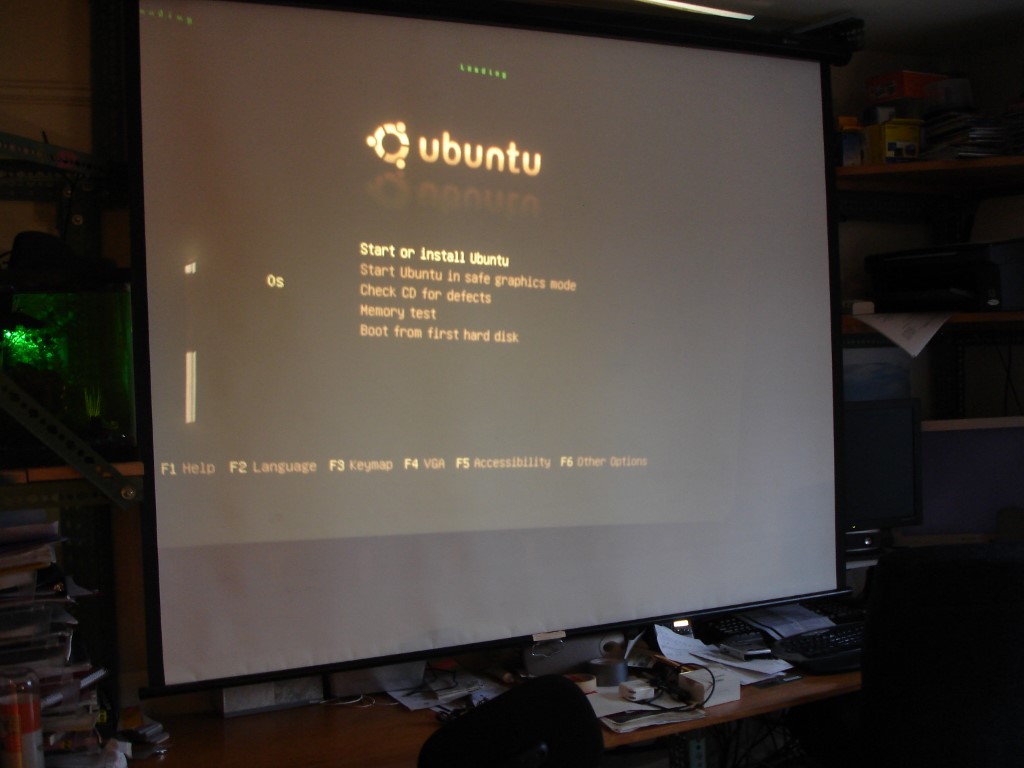
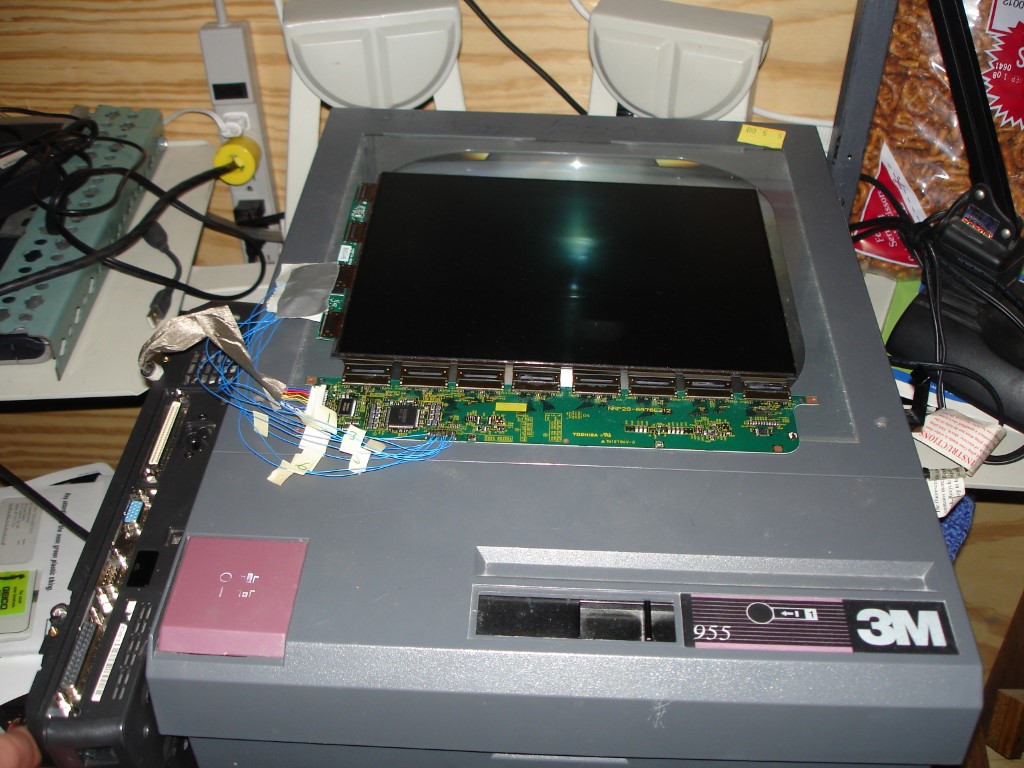
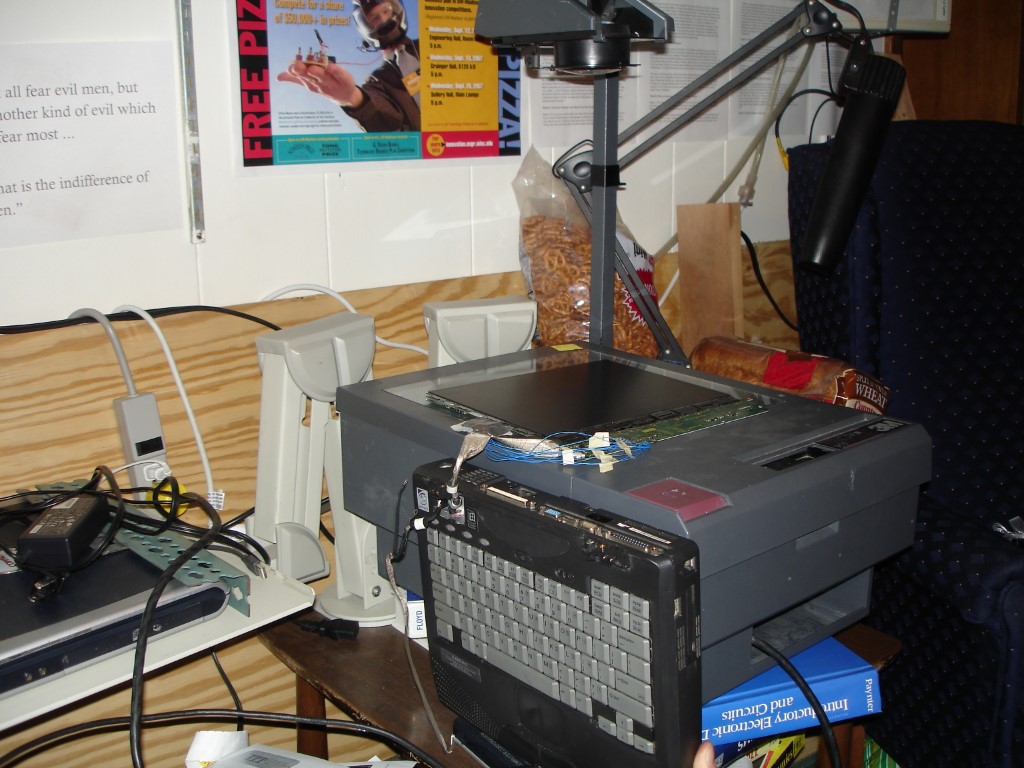
Image Notes
1. It works!
2. Make sure you space the LCD off the surface of the projector!
5. Laptop body mounted off to the side of the projector.
1. It works!
2. Make sure you space the LCD off the surface of the projector!
5. Laptop body mounted off to the side of the projector.